Showing posts with label gluten-free. Show all posts

Monday, March 19, 2012

Chocolate Brownies

Great brownies these - not dry and crumbly, but moist and with a great helping of raspberries.

Ingredients
  • 200g butter
  • 100g milk & 100g dark chocolate
  • 80g dark cocoa powder
  • 65g gluten-free flour (I've used variously brown rice, sorghum, even millet but regular gf flour like Dove's Farm will do too)
  • 1 teaspoon baking powder (or a little more)
  • 200g castor sugar (could use more but this works for me(
  • 4 large eggs
  • 1/2 cup raspberries (frozen is fine and hardly need defrosting)
  • 1/2 cup pecan nuts or similar, chopped
  • some ice-cream or creme fraiche to finish
Preheat your oven to 180°C/350°F/gas 4. Line a 25cm square baking tin with greaseproof paper. In a large bowl over some simmering water, melt the butter and the chocolate and mix until smooth. In a separate bowl, mix together the cocoa powder, flour, baking powder and sugar, then add this to the chocolate. Add nuts if wanted. Stir together well. Beat the eggs and mix in until you have a silky consistency.

Pour your brownie mix into the baking tray, decorate with the raspberries, and place in the oven for around 25 minutes. You don’t want to overcook them so, unlike cakes, you don’t want a skewer to come out all clean. The brownies should be slightly springy on the outside but still gooey in the middle. Allow to cool in the tray, then carefully transfer to a large chopping board and cut into chunky squares.

Really yummy. Also freeze perfect - just wrap in tin-foil and nuke afterwards to serve!

For the carb-counters, I make it at least 350g CHO for the tray. That works out about 20g CHO per generous slice which is pretty good 'bang per buck' carb-wise.

Tuesday, January 17, 2012

Pizza

Pizza. The quest is over! Okay, not really over the top - I've been looking for a decent gluten-free pizza base for too long. The boys have suffered some pretty bad results and hope was waning!
There are lots of gf pizza base recipes out there. Many involve making effectively a batter that you press out into a tray. I always felt this whacked out any air that might have been in there.
This one is different. You get a dough though it's really sticky. You'll also have to stock up on flours - we've got tapioca, white rice, corn, sorghum here. I've read versions that use just a blend but I'm risking nothing - this works and works well.

I found this on 'The Happy Tummy' blog but I'm sure Rebekah won't mind my reposting here for my convenience and for others.


Ingredients

  • 3/4 cup tapioca flour
  • 1/2 cup white rice flour (not brown, apparently tastes gritty)
  • 1/3 cup corn starch (that's corn flour to us)
  • 1/3 cup sorghum flour (Juwar flour)
  • 1 teaspoon xanthan gum
  • 1 1/2 teaspoons salt
  • 1 tsp italian seasonings (optional)
  • 1/2 cup whole milk
  • 1/4 cup water
  • 2 1/4 teaspoons active dry yeast
  • 2 teaspoons sugar
  • 2 large egg whites, lightly beaten
  • 'Dough' mixture ready to 'roll'
  • 2 tablespoons olive oil + plus more to use on your hands when handling the dough
Direction
  1. Use an electric mixer to whisk together tapioca flour, white rice flour, corn starch, sorghum flour, xanthum gum, and salt.
  2. Combine milk and 1/4 cup water and heat in microwave until warm but not hot to the touch, about 45 sec -1 minute
  3. Stir in yeast and sugar. Let proof for about 5 minutes. You should see a nice foamy top, indicating that the yeast is active. 
  4. Add milk–yeast mixture, egg whites, and 2 tablespoons oil to dry ingredients and beat at medium speed, scraping bowl occasionally, until dough is very smooth and very thick, about 5 minutes. The dough will still be pretty sticky which is ok.
  5. Preheat oven to 200°C fan. Put your baking tray in the oven on the bottom rack to preheat.
  6. Have ready two 12-inch squares parchment paper, dusted with white rice flour. Scrape half of dough onto each square and form each half into a ball.
  7. Next, you need to form a round approx. 9" diameter on the two sheets of paper as thin as possible/desired, around 4mm. This is tricky. I used a silicone spatula dipping regularly in olive oil and spreading like icing on a cake working from inside out.
    I've read that dusting with white rice flour underneath and on top and using a rolling pin can work. Your mileage may vary but persevere because this is worth it.
  8. Some versions also recommend you prove the rounds in a draught-free place for 30min while others say it isn't necessary. I did but will try not doing so next time and compare. I did notice a substantial rise but would expect something similar from oven-spring had I gone straight to oven.
  9. Place your pizza rounds onto the oven trays on bottom rack for 6 minutes or slightly longer.
  10. Remove from oven, remove parchment paper (now not sticky) and maybe dust with polenta grains. Then top with all you want and put back in bottom of oven for 10 minutes.
    At this point, you can reserve your round, let it cool and wrap to freeze for later use.
    I put a lot of toppings on mine and didn't hold back on the tomato sauce either, and it wasn't any wetter than a regular dough pizza.
Pizza 'rounds' rolled
Truthfully, this is so good that I probably won't bother with my regular dough mixture. Securing against cross-contamination is just to much hassle. The flours involved don't come cheap though at about 6X the price of regular good white flour. But you're not going to be eating pizza everyday, right?!

Now for diabetes... well, tapioca flour ain't that great. It's not that it's bad for you, it's just empty carbs. In fact, it pretty much all starch (a complex carbohydrate) and as refined as any flour so will bump your glucose levels up pretty quickly. Of course, any fatty food atop the pizza will have the opposite effect, delaying the release of the food (and hence glucose) from the stomach. Pizza is classic nightmare food for diabetics but with our little one eating a single medium slice, it was handled well with no spiking or delayed rise. Maybe, we got lucky but hey, this is a treat meal so what the heck!
Update: On second attempt, pizza was fine but despite allowing 36g CHO for half a 9" round, we seriously overshot and crashed. Seems wither 36g is too much or there is a significant delay in releasing sugars. Or, of course, a million other things... use pizza with caution!

Carbs per slice (9" round makes 6 generous slices): 30g CHO though this is a swag (seriously wild-ass guess!)

After-thought: It really is testimony to the power of the web how alchemy like this can be refined in a relatively short time. Bread making goes back about 30,000 years. I don't know how long we've been working on gluten-free variants but without the mass exchange or ideas and effective crowd-sourcing of recipes, the production of decent pizza crust would have taken a lot longer!

References


Buckwheat Pancakes

These are the real deal. Okay they're gluten-free but these win hands down over the wheat variety. In France, buckwheat is traditionally used for crepes, especially savory ones.

I can't claim any credit here. David Lebovitz, an American chef living in Paris hosts an excellent site (try his tarte au citron) provides the recipe.

I used Doves Farm Buckwheat flour. Buckwheat is actually made from the seed of buckwheat plant, a close relative of Rhubarb. And from Doves Farm:
"The specific characteristics of buckwheat proteins, and the relative proportions of its amino acids, make buckwheat the unsurpassed cholesterol-lowering food studied to date.
Compared with true grains, buckwheat is high in minerals: especially zinc, copper, and manganese.
Healthier fat profile. Unlike true grains, buckwheat’s low fat content is skewed toward monounsaturated fatty acids—the type that makes olive oil so heart-healthful."

Tuesday, January 10, 2012

Gluten-free bran bread

Ingredients

  • 600g Tritamyl flour (gluten-free flour)
  • 325g soya bran
  • 150g brown sugar
  • 3 eggs
  • 100ml sundried tomato pesto
  • 1L buttermilk
  • 2 tsp bread soda
  • 2 tsp Xanthan gum (if freezing)
Direction
  1. Preheat oven to 180C and lightly grease a loaf tin.
  2. Place all ingredients into a bowl and combine well together.
  3. Bak bread for 45min to 1 hour or until it sounds hollow when tapped.
  4. Transfer to a wire rack to cool.
  5. Sprinkle sesame seeds over the top while cooling.
  6. Allow to fully cool before cutting.
Sundried Tomato Pesto
  • 6oz semi-sundried tomatoes
  • 2 cloves garlic
  • 8 basil leaves
  • 200ml extra virgin olive oil
Place ingredients in a food blender and blend for 2 min, season and set aside.

Gluten-free Sweet Pastry

Another likely Neven Maguire recipe, and if so, thanks. This time sweet pastry, but easy to adapt for savoury.


Ingredients

  • 225g butter
  • 50g sugar
  • 2 eggs
  • 110g rice flour
  • 110g polenta meal (fine)
  • 110g potato flour
  • 2 tsp xanthan gum
Direction

  1. Blitz in a food processor until paste is formed. Do not overwork.
  2. Chill before use.
  3. Line flan ring and bake blind.

Gluten Free Bread

I think this recipe originates from the kitchen of Nevin Maguire and if so, it is very much appreciated. This makes 1 loaf of gluten-free bread.


Ingredients 

  • 7g sachet dried yeast
  • 2 tsp sugar
  • 400g gluten free flour (I use Bob's Red Mill or Dove's Farm)
  • 1/2 tsp salt
  • 50g milk powder
  • 1 tbsp xanthan gum
  • 2 eggs, beaten
  • 60ml oil
  • 1 tbsp sesame seeds
Direction

  1. Lightly grease a 22 x 5 x 5.5 cm loaf tin. Place the yeast, sugar and 440ml warm water in a small bowl and stir well.
  2. Leave in a warm place for 10 minutes or until bubbles appear on the surface. The mixture should be frothy and slightly increased in volume.
  3. Sift the flour, salt, milk powder and xanthan gum into a large bowl. Make a well in the centre and add the yeast mixture, egg and oil. Using a wooden spoon, stir together well until it forms a soft moist mixture. Beat for 1 minutes.
  4. Spoon the mixture into the loaf tin and smooth the surface with moist hands. Sprinkle with sesame seeds over the top.
  5. Cover with lightly greased plastic wrap and leave in a warm place for 1 hour or until risen to the top of the tin.
  6. Place in a preheated oven at 190C/Gas 5. Bake the bread for 40-45 minutes or until it is golden and sounds hollow when tapped. Leave in the tin for 5 minutes before transferring to a wire rack to cool. Allow the bread to cool completely before cutting.

Monday, January 2, 2012

Lemon Trickle Cake

Another great Hugh-Fearnley Whittingstall recipe though one found in other places. This we made with Bob's Red Mill gluten-free baking flour. You can find it occasionally at Tesco or at iHerb.com (state-side but ship to ROI). It's a reliable blend of various gf flours and well worth the (slightly crazy) price.
If you're using plain baking flour, be sure to add some gf baking powder and baking soda (sodium bicarbonate).
For this quantity of flour, I used 1 tsp of baking powder and 1/2 tsp of baking soda. I also added some Xanthum gum to help with structure (about 1/2 tsp).

Ingredients (serves 10 generously)

  • 175g butter, softened
  • 125g caster sugar
  • finely grated zest of 3 lemons
  • 3 med eggs
  • 175g self-raising flour
  • pinch of sea salt
  • splash of milk (optional)
  • 80g icing sugar
  • some lemon juice
Directions
  1. Put butter and sugar in a large bowl and beat for 10 minutes with Kitchenaid or other electric blender - 5 min will do but 10 better.
  2. Add zest and eggs, one  at a time and with a spoonful of flour in between to help binding
  3. Sift remaining flour and salt into blow and fold. Add a little milk if mixture doesn't drop easily from spoon.
  4. Spoon into loaf tin (I used 2lb, fitted comfortably, though non-gf might rise more) and smooth top. Don't forget to line with parchment paper.
  5. Bake at 170C for 40-45 minutes.
  6. When done, mix icing sugar and enough lemon juice make pliable and drizzle over cake in the loaf tin. First though, make plenty of 'holes' in the cake with a skewer to let the icing soak in well.
  7. Leave into tin until cool, then turn out and slice.
By my reckoning, a decent slice weighs in at 30g CHO but go very light on the icing sugar and that can be nearer to 20g.

Saturday, October 22, 2011

Moist Carrot Cake

Carrot Cake
Often, I find gluten-free cakes can tend towards being a bit dry - this definitely isn't. It's a carrot cake based on a BBC recipe. I find the BBC recipes to be really good in general and this is no exception. I've made some changes though - it's a little too oily and as usual there's too much sugar. Here's what went down well at ours!
  • 120g light muscovado sugar - I reduced this a lot (from 175g) and plenty sweet
  • 125ml sunflower oil - rapeseed oil would be lighter & I reduced from 175ml
  • 3 large eggs , lightly beaten 
  • 140g grated carrots (about 3 medium, though you can squeeze in a little more) 
  • 100g raisins grated 
  • zest of 1 large orange 
  • 175g self-raising flour - I used Dove's Farm GF plain white and wholemeal flours. I added a tsp of baking powder as raising agent. I mostly used the wholemeal and it gave a nice colour.
  • 1 tsp bicarbonate of soda 
  • 1 tsp ground cinnamon (you might want a little less though it does lower glucose levels!)
  • ½ tsp grated nutmeg (freshly grated will give you the best flavour)
For the icing you can go with cream cheese or the following:
  • 120g icing sugar 
  • 1½-2 tbsp orange juice
Directions:
  1. Preheat the oven to 180C/Gas 4/fan 160C. Oil and line the base and sides of an 18cm square cake tin with baking parchment.
  2. Tip the sugar into a large mixing bowl, pour in the oil and add the eggs. Lightly mix with a wooden spoon. Stir in the grated carrots, raisins and orange rind. 
  3. Mix the flour, bicarbonate of soda and spices, then sift into the bowl. Lightly mix all the ingredients - when everything is evenly amalgamated stop mixing. The mixture will be fairly soft and almost runny. 
  4. Pour the mixture into the prepared tin and bake for 40- 45 minutes, until it feels firm and springy when you press it in the centre. Cool in the tin for 5 minutes, then turn it out, peel off the paper and cool on a wire rack. (You can freeze the cake at this point.) 
  5. Beat together the frosting ingredients in a small bowl until smooth - you want the icing about as runny as single cream. Set the cake on a serving plate and boldly drizzle the icing back and forth in diagonal lines over the top, letting it drip down the sides.
One of the best received and easy cakes we've made in a while. Estimating the carbs is a little tricky but I think 20g CHO per slice was our best guesstimate, with 15 slices in the above recipe - well worth it!

Saturday, August 6, 2011

Chocolate Fondants

These are a Gordon Ramsey recipe but with a little less swearing (just). Actually, they a neat, freezable dessert and go well with a little whipped cream. In good diabetes fashion, I cut the sugar by about 40% and you could probably go further - still the site says each fondant weighs in (before reducing) at 52g CHO (makes 9 fondants). Well, I got 10 from the recipe but they are big and it'd be reasonable to expect 12 or more, bringing the count below 40g (maybe 30g if you go easy on the sugar) - okay, these are a hard sell, but they are nice.
Depending on your oven, you'll want to give these about 12 minutes - any longer and you'll lose the gooey inside. They freeze really well in little ramekins and the microwave will resurrect some of the gooey insides if you want to cheat.
I used Dove's Farm gluten-free white flour which does the job well for things like this. Enjoy.
And (for an added bonus) if you're looking for something to use up the left-over egg whites, check out this recipe for Naim-naim cake. It's easy and makes a great change from meringues!

Easy bread rolls

Want a quick, easy, fool-proof gluten free roll? Buy a pack of Juvela fibre mix. These are a blend of flours that just need water, salt, sugar, oil and yeast (included). Just fire in the oven after 30min rise and you get decent springy rolls that surprised me.

Gluten-free Crusty Boule

Artisan Crusty Boule - ready to rise
UPDATE:
I revisited the 'Crusty Boule' again lately (Aug 2012) not having tried it in a while and having made do more often than not with some worthy shop-bought alternatives. However, it was time to try to improve on this and so I gave 'Crusty Boule' another try.
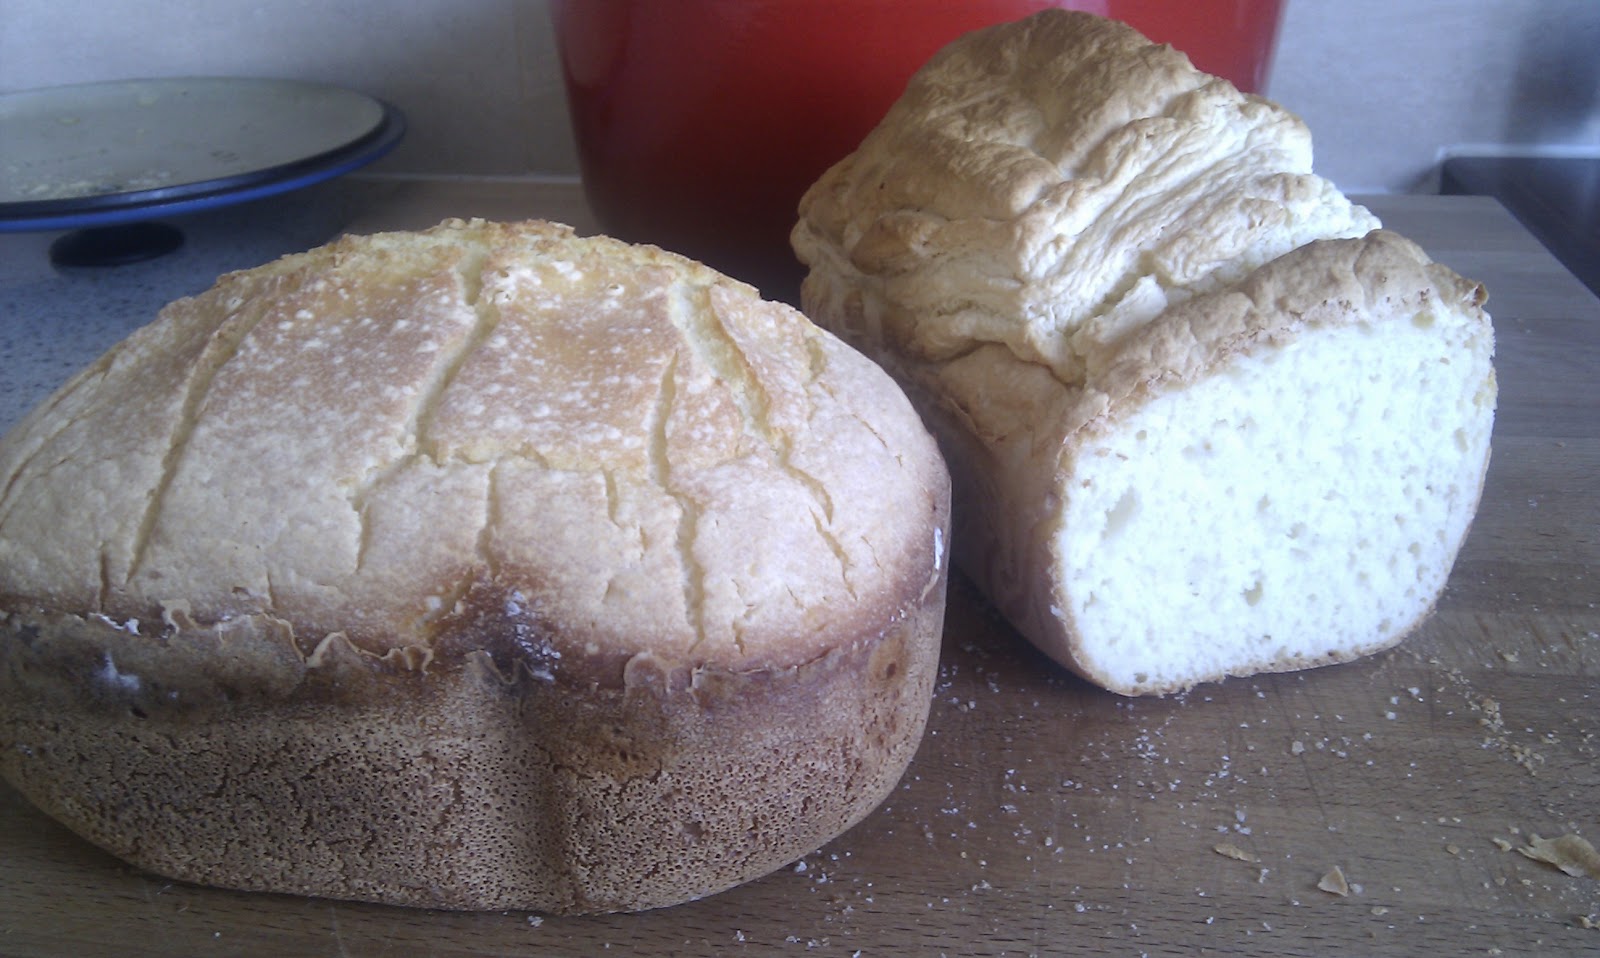
This time around I used a 'Dutch oven' - a Le Creuset large pan (lid on for 20 min at 250C, lid off for 15min at 200C). Haven't done the carb count but the slices feel heavy. But, the (fresh) taste was pretty wonderful - chewy, crunchy crust, great robust internal structure. It got the definite thumbs up from our chief tester. I've sliced and frozen some so we'll see how they work out. But following Jeff Hertzberg's recipe is probably best - keeping the dough in the fridge, take out to proof and bake as needed.
Note to self: Didn't have the second cup of brown rice flour so sub'd Doves' Farm strong brown bread flour.

In our (on-and-off) quest for a decent gluten-free bread, there have been many 'also rans' and too many too-bad-to-eat contenders. I'm a sucker for the one's that involve 6 or more exotic flours and ingredients in the hope that with that much science in the mix, the outcome must be amazing.
One such hopeful is a Karina Allrich's site Gluten-free Goddess. This beautifully produced site is hailed as supreme by many. There are plenty of tempting recipes in there (sweet and savoury) - I've tried chocolate chip gf cookies. However, they were very fragile and we've found the Dove's farm version much better, though it could just be me.
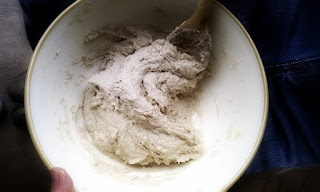
Crusty Boule - almost risen
The other problem I have with Karina's recipes is the array of flours she uses. Okay, I'm good with potato, tapioca, various gluten-free mixes, soya, brown and sweet rice, buckwheat. But coconut, hazelnut, quinoa! Please, my saucepan press is laden with flours! Seems you can take any nut, seed, flower or whatever and grind it to a flour. Every new recipe introduces yet another new flour so a halt had to be called. On top of that, some of the recipe directions are seriously detailed and need a carefully choreographed approach.
Ready for the oven (almost)
Fast forward to Artisan Bread in Five with Jeff Hertzberg and Zoë François. They offer up a very temptingly labelled Gluten-free Crusty Boule. I've tried this twice now and it works. Okay, we're not talking Parisian delight here but it has a crusty exterior, springy interior and isn't (too) heavy. The taste is satisfyingly chewy and there's plenty of bounce. It doesn't crumble to dust when you approach it and the recipe isn't complicated (no overnight, multi-step rises).
Now we're still still some odd-ball flours in here - tapioca, brown rice and sorghum flours. I had the first two for months while trying to track down the last. Tir na nOg (in Sligo) have tapioca and occasionally brown rice. Or try Cosgrove's on High St. who have a great gluten-free range, by the way. But sorghum is another matter. Shout out to Anu, a brilliant friend from India, who ran down what she would call Juwar (Sorghum) flour, apparently very popular in Africa and India where wheat is more expensive. I've only sourced it to Eurasia ethnic food supermarket in Fonthill, near Liffey Valley, Dublin. It can be had online but don't come cheap.
Ready to eat!
You'll also need Xanthan Gum which you'll pick up in most supermarkets but the making up is easy and the dough keeps for a few days in the fridge though I've found it best to bake on the day. After all, there's only one rise needed.
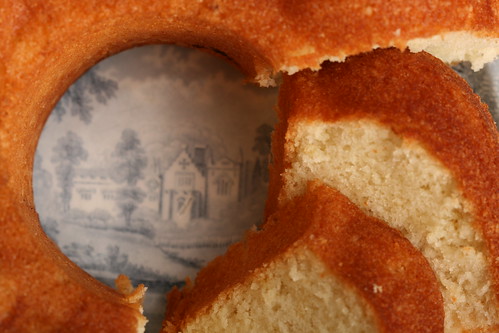
I can rest now - this works and is especially good with cheese or pate. This is said to be great for pizza dough too and I can see how that would be - I feel a trial coming on but after recent efforts on that front, I think I'll have to wait for the memories to fade.

And the final result, just fresh from the oven....

P.S. Worth mentioning here a gluten-free flour mix by Carol Fenster. Haven't tried it but from my experience, the flours are those I've had most success with and (most) are readily available.

Friday, April 22, 2011

Lemon & Lime Sponge

IMAG0185We had a handful of lemons and limes handy and the oven was on so this was quickly thrown together. The kids had drained eggs earlier to paint them so baking was on the agenda anyhow.

Ingredients

  • 50g butter
  • 100g golden caster sugar
  • 1 lemon, zested
  • 1 lime, zested
  • 50ml lemon juice
  • 50ml lime juice
  • 3 eggs, separated
  • 50g plain flour (I used Odlums Tritamyl White Bread Mix)
  • 250ml milk

Directions

    1. Heat oven to 160C (fan). Beat butter, sugar and lemon and lime zest together in a mixer. Add juices, egg yolks, flour and milk one by one to make a smooth batter. Pour into a large bowl.
    2. Whisk egg whites until firm - fold into the batter. Pour into oven-proof dish and put in a baking tray half filled with hot water. Bake for 25-30 minutes until lightly browned and set.

This reminds me of Jamie Oliver’s dish, same deal. Nice easy dessert that’s easy for the kids to mess with making.

Carb count isn’t great – I reckon 8-10 portions at about 20-17g CHO apiece. I might try reducing the sugar further next time but with those lemons & limes, it could push it too far. On the up side, the Odlums Tritamyl flour worked well – though it’s a small player in this. Doves Farm still have my vote.

Verdict: darn good considering the easy of making this.

Chocolate Chip Cookies

IMAG0173Curiously for a blog on diabetes, you'd think that we do nothing but bake sweet things. Considering the diet constraints, it's more about proving that it's possible than the actual eating part. Anyway, there's always exercise to burn through the glucose and make room for more.

This recipe basically from Hugh Fearnley Whittingstall so the solicitors will know who to represent. I think we used the Doves Farm gluten-free plain flour here and thankfully it performed really well - these are seriously nice biscuits (ok, cookies) that go nice and crispy and strangely lasted well (well, they were gone in 4 days and just as crispy by then). They're not gooey in the middle if that's your thing but plenty chocolaty none-the-less. I took the usual 60% of the recommend sugar and it wasn’t missed.

Ingredients

  • 125g unsalted butter
  • 60g caster sugar
  • 50g soft light brown sugar
  • 1 medium egg, lightly beaten
  • 2 tsp vanilla extract
  • 150g plain flour (Doves Farm Gluten-free plain flour)
  • ½ tsp baking powder (Barkat gf)
  • Pinch of salt
  • 100g dark chocolate, chopped into smallish chunks

Directions

  1. Preheat the oven to 190°C and line 2 baking sheets with baking parchment.
  2. Melt the butter in a small saucepan. Put both sugars into a mixing bowl, pour in the melted butter and beat well with a wooden spoon. Beat in the egg and vanilla. Sift the flour, baking powder and salt into the bowl and stir them in, then add the chocolate. It’s somewhat sloppy at this point.
  3. Drop heaped teaspoons of the mixture on to the baking sheets, leaving a good 4cm between them as they really spread out. Bake for 8-10 minutes, until the cookies are turning pale golden brown.
  4. Remove from the oven and leave on the baking sheets for a couple of minutes to firm up. Then carefully lift the baking parchment on to a wire rack and leave to cool completely.

First time around we made big ones (see picture) and these I worked out at around 18g CHO, so you need to plan ahead with these puppies or negotiate sharing one (good luck with that). I’d go with half the size for around 10g CHO.

Thursday, March 31, 2011

Gluten-free bread Quest

And so the search continues. So far we've made a white and brown with Odlums Tritamyl bread mixes. Initially looked promising but no taste and wouldn't freeze. Seems to self-destruct after a day or so. I could grate it into crumbs just rubbing it gently. To be fair, it was the version I put in the bread-maker that didn't survive the freezer.
We then bought the brown seeded loaf from M&S. This is a small pan which needs slicing (tricky!) and freezes well. You'll need 2 slices to make a 15g CHO sandwich. Not a bad loaf but uses largish seeds to give that bite that the gluten would have given. Not a big hit with the taste-tester though I thought it was reasonable - seeds/nuts are not favourites when visible, though I pack small mountains of them into the peanut and honey bars.

And now to the Gourmet Parlour. They I learned do a white and brown loaf (pic) as well as bakewell tart and chocoloate brownie slices. Not cheap: loaf €3.95 and slices €1.95 though they'll last the princess ages. Bakewell tart not that great and won't see a repeat purchase though it wasn't all that bad in fairness. The brown loaf review has come in and it's getting a thumbs up. Seemed very heavy, dense and moist to me and I'm fearing the CHO count once I get to weigh it. But it has a firm crust and can be cut into thin enough slices to use for sandwiches. I'm hopeful with this so long as it freezes okay to use for lunches.

Speaking with one of the owners, they use Doves Farm Gluten-free brown bread flour and I think add some extra baking powder and xanthan gum. Have a pack of the white Doves Farm flour in the press but hesitant to use it - it's the one I'm most hopeful about!

Friday, March 25, 2011

Odlums Gluten-free bread mix

A tale of two breads: breadmaker on left, over-baked on right
It's been a tough week on the diabetes/coeliac front so I was due for a turn of fortune. It was back to our quest for something that could be called bread, coeliac-style. Having tried using Odlums Tritamyl self-raising flour to make a lemon 'cake' recently, I wasn't too optimistic - actually, the cake wasn't that bad, just not worth the carbs!
So with fingers crossed I took Odlums Tritamyl White Bread mix and did a test of two bakes. I'm a big fan of the Panasonic bread-maker (mine's a SD254) and have been happily churning out decent bread for a couple years now. So, I baked a small 2lb white loaf in it and a simpler version in the oven. Both followed the recipe on the pack - just the flour, water, oil. I added an extra tsp of rapid dried yeast and an egg to the bread-maker version but otherwise the same.


The result?
Great! Okay, my expectations have been well-tempered recently but having just downed a fresh slice with some brie, I really can't complain. Having baked the Odlums Brown bread mix a week ago, I was expecting little by way of flavour but this was miles better. It took the full 45min in the oven, or about 2hrs in the bread-maker. The texture was good and not crumbly with plenty of holes; the crust reasonably was crispy and there was that bit of chewiness that makes strong-flour bread satisfying. Haven't tasted the bread-maker version yet but I'm hopeful of similar results.


Okay, the oven-baked is well, ugly looking while the bread-maker is slightly squat due to the shape of the bread-pan. Even the mixing of the oven-bake was easy, just a hand electric blender for a few minutes. I used a paper liner for the loaf tin which are a great time-saver.


Next up is Doves Farm flour... stay tuned!

Saturday, March 19, 2011

The Humble Digestive

Things get complicated pretty fast when you start avoid gluten. The humble Digestive biscuit (or Graham cracker as they call it in the states) is a staple not just for hypos but as they very necessary base in any given cheesecake. And of course, the cheesecake is a handy diabetes stand-in.
So here goes...


Ingredients
100g buckwheat flour (or plain flour)
1/3 teaspoon baking powder (make sure it's gf)
50g butter
30g dark brown soft sugar
2 tablespoons milk
pinch of salt

  1. Crumb in the butter to the flour mixture and add milk to bind into a dough.
  2. Roll out to 1/2inch thickness (tricky this but hey, it's home-made)
  3. Cut out funny shapes and prick with fork before chilling in freezer for 10 minutes
  4. Place on baking parchment and bake for 150C for 10-12 minutes - watch, they burn quickly
  5. Transfer to wire rack to cool
  6. Like other biscuits, they can be frozen but do so individually and in tinfoil wrap
Verdict
These are lovely, very crisp and slightly crunchy like a biscuit should be. A little bit of an effort for what was previously handily in the press but there is the entertainment factor of baking them.


Carb Counting
I reckon we got about 25 small star shaped biscuits from this batch and the total carb count on the ingredients above comes out at about 115 so I round out each biscuit to 5g. Not too bad but I'd down 3 at a time!

Bringing home the biscuits

The experimentation began in earnest today - baking biscuits sans wheat flour. Armed with an array of the flours - basically every bean or seed that could be milled - I began googling and came up with Buckwheat Chocolate Chip cookies (yes, seems the US has a lock on biscuits).


The recipe comes from Karina Allrich, the self-proclaimed Gluten-free Goddess (ouch!). First off these are big, not McDonald-size but about 5cm across and not slim, so you'll need plenty of baking trays to spread them on if you want them thinner.


Dry Ingredients
1 cup organic buckwheat flour (84 carbs)
1 cup rice or sorghum flour (110 carbs)
1/2 cup tapioca starch (used cornflour instead) (90 carbs)
1 1/2 teaspoons xanthan gum (probably don't need this if using plain flour)
1 1/2 teaspoons baking soda
1 teaspoon sea salt

"Wet" mix ingredients:
1 cup butter/margarine
1 cup light brown sugar (I reduced this from 1.5 cups, seems fine) (200 carbs)
1 tablespoon vanilla extract
1 tablespoon honey (17 carbs)
2 free-range eggs, beaten

Add-ins:
2-5 tablespoons milk
1/2-1 cup dark chocolate chopped (milk chocolate would add *lots* to carb count)
1/2 cup chopped nuts, coconut, or chopped dried fruit, if desired


Directions

  1. Bring the dry ingredients together and mix thoroughly. In a separate bowl beat the butter/margarine, sugar, honey and vanilla extract. Add in the beaten eggs and beat to combine.
  2. Add the dry ingredients bit by bit using the milk to form a dough.
  3. Add in the chocolate chips and/or nuts.
  4. Chill the dough mixture for an hour.
  5. Spoon out 20 little dough-balls and place on baking tray (use baking parchment if you don't want them to stick!). Flatten them down to make them into (vague) biscuit shapes (ah, round).
  6. Bake for 12-15min. at 180C in a fan oven
  7. Remove to cooling rack where they'll crisp up as they cool.
If you plan on freezing them, cool completely and wrap individually in tinfoil.


Ingredient check:
In case you're wondering Xanthum Gum is there to replace the affect of gluten. Can be had in M&S (Enniskillen) and www.ecodirect.ie or www.iherb.com. The flours can be found in Holland & Barrett, Kate's Kitchen or Tir Na nOg as well as from Doves Farm web-site. I'll likely get around to post on flour retailers so given how much of it I'm getting through!


And now for the carb count:
Not the best of news here. The different flours have different carbs but overall I think this number would be pretty close for plain flour. (Drum roll please) - 20 biscuits at 25 carbs apiece. Now that said, I got 27 easily and would have preferred more (smaller) biscuits but ran out of baking trays! Our precious would be thrilled with 12 carbs-worth of these, though must make smaller since 25 carbs is a no-no.

Update:
Baked a dream and waiting to see how they taste! We'll have to post an armed guard for tonight! They are light and crispy and very home-made looking so fingers crossed.
Update:
These didn't work! They looked great but they crumble into too fine a crumb (powder?) when ate. Maybe I'll try a smaller batch and bake for longer. Would welcome any ideas...